Using Google Voice for business is quick and easy as long as you have a stable internet connection and a Google account. It works seamlessly across iOS and Android devices, a web browser, or even a desk phone. Core functionalities include unlimited domestic calls, text messaging, voicemail transcription, and an auto-attendant. In this walkthrough, we explain how to use Google Voice and make the most of its features.

Access Google Voice through a web browser or mobile app. (Source: Google.com)
1. Getting started on Google Voice
To start using Google Voice, you need to sign up for a Google account. After logging in, open voice.google.com in your web browser. You’ll be prompted to choose between using Google Voice for personal or business purposes. Below, we provided separate steps to set up Google Voice for both options:
Google Voice only allows calls between US or Canada-based Google Voice phone numbers. It is also available in selected countries within Europe, including France, Germany, Italy, Spain, the U.K., Belgium, Denmark, Ireland, Portugal, Netherlands, Sweden, and Switzerland. However, Google doesn’t allow countries outside the US to make calls over Google Voice.
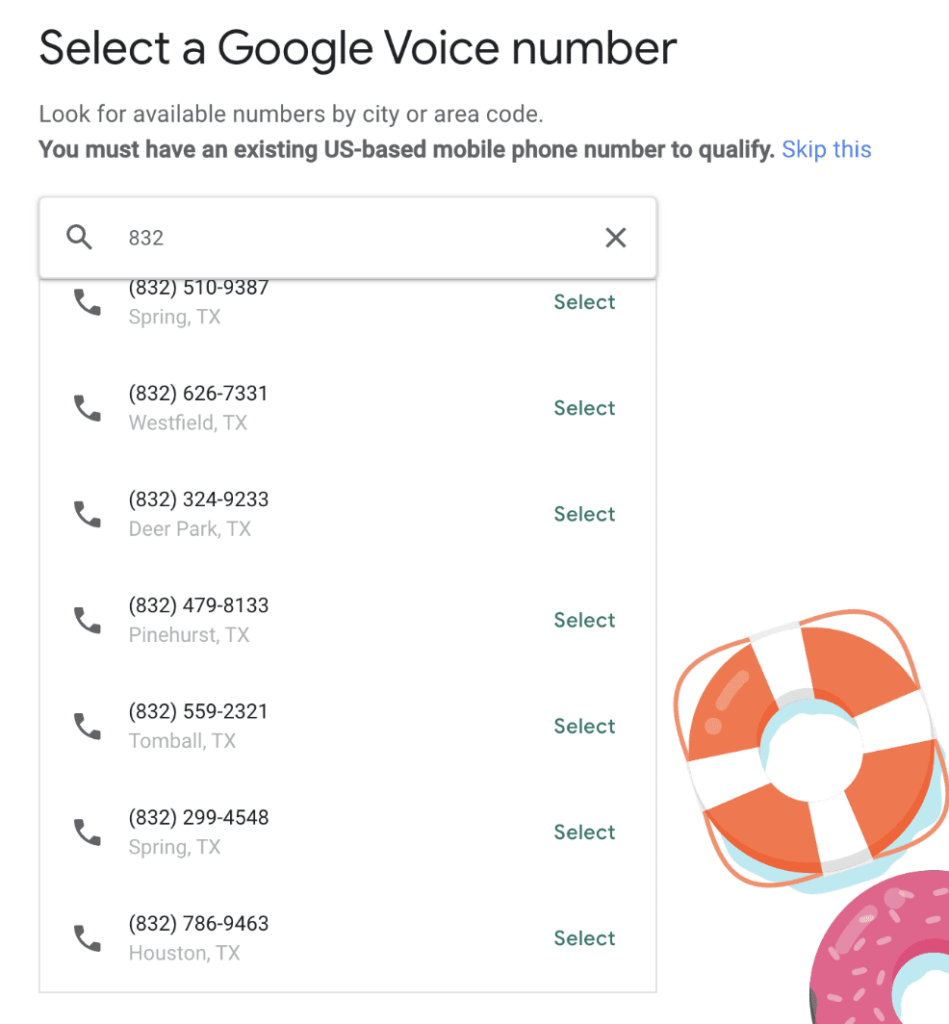
Access to Google Voice requires a US-based number for verification. (Source: Google)
Making calls
Make calls to domestic and international locations using your Google Voice number. Here are two ways to initiate a Google Voice call from your desktop or mobile device:
Step 1: Go to voice.google.com and select Calls .
Step 2: In the top search bar, enter the name of the saved contact you want to call. If the number isn’t a saved contact, tap the dial pad and enter the number.
Step 3: Select Call to initiate a phone call.

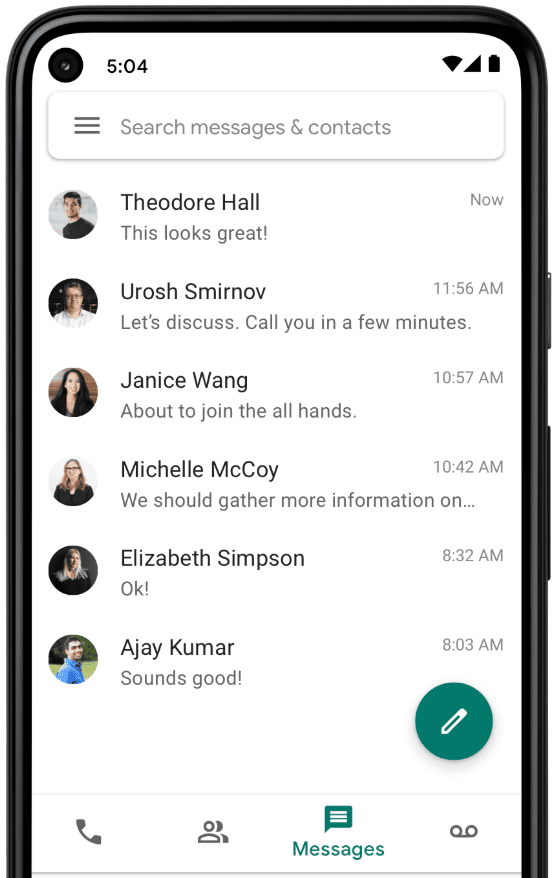
Access the Calls tab in the upper left corner of your dashboard. (Source: Google Workspace)
Step 1: Open the Google Voice app and tap Calls at the bottom left side of the screen.
Step 2: There are two ways to choose who to call:
- To enter a number, tap the dial pad .
- To call a saved contact, tap Contacts or enter the name on the top search bar.
Step 3: Tap Call.

Transfer calls seamlessly with Google Voice’s mobile app. (Source: Google)
To configure call handling features, go to Settings within the Google Voice app. Here, you can configure your preferences for call forwarding, call screening, missed call notifications, and incoming call options. You can also set up your Wi-Fi or mobile data to make and receive calls.
Sending text messages
Google Voice restricts text messaging to up to seven phone numbers due to carrier limitations and spam protection. You can use it to provide customer support, but it is not intended for bulk messaging. Follow the steps below to start sending SMS:
Step 2: Choose Messages and select Compose (mobile device) or Send a Message (desktop).
Step 3: Enter the contact’s name or number in the recipient field.
Step 4: Type your message and hit Send.To attach an image, click the Image icon. Note that images should be smaller than 2MB. Anything above 2MB will be sent as a smaller file.
Send unlimited text messages within the US using your Google Voice number. (Source: Google)
Checking voicemail
Using Google Voice for business enables teams to route calls to a voicemail inbox, ensuring more efficient communication. The steps for checking your voicemail are nearly identical on desktop and mobile devices. To check your voicemail, follow these steps:
Step 2: Select a voicemail message and click Play to listen. Below the audio player is the text transcription of your voicemail. You can then choose to call back or send a quick reply.
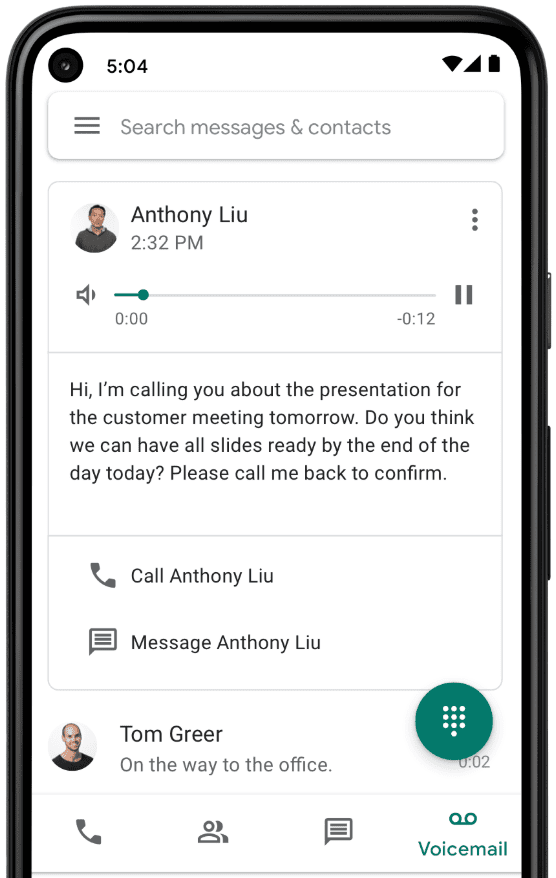
Google Voice uses AI to transcribe voicemail into text format. (Source: Google Voice)
Step 3: On the upper right, tap the three-dot menu icon ⋮ to access the following features:
- Copy number
- Copy transcript
- Add contact
- Block number
- Mark as spam
- Archive
- Delete
Setting up the auto-attendant
Top virtual phone systems like Google Voice let you set up a multi-level auto-attendant for effective routing of incoming calls. This gives callers a menu that can respond to their queries when no one is available to answer. Here’s how to create an auto-attendant on Google Voice:
Step 2: From there, you will see a list of your current auto-attendants. At the top, click Create.
Step 3: Assign a name to your auto-attendant and, if needed, add a description. Whendone, click Create.
Step 4: Create an initial greeting by adding a welcome message. You can upload an audio recording or use the text-to-speech feature.
Step 5: Click Done.
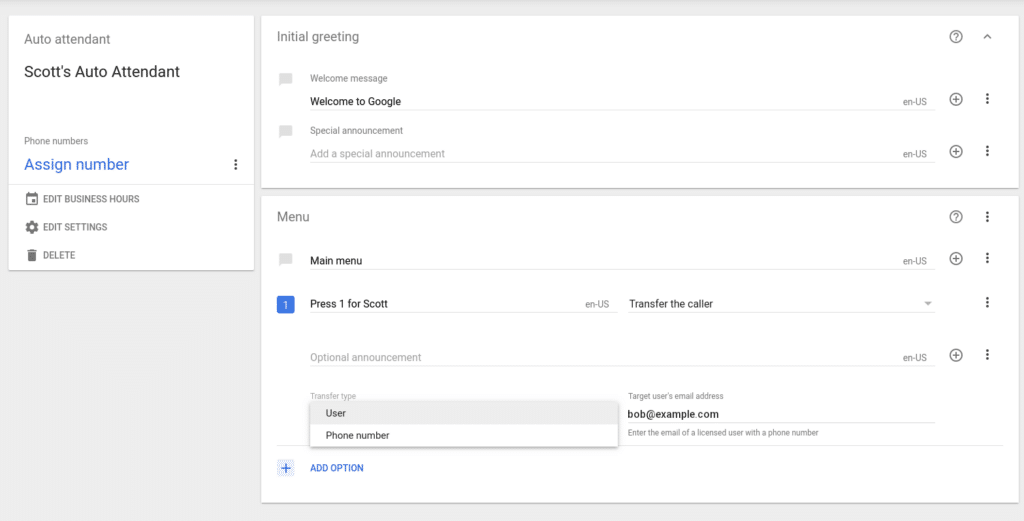
Configure the auto-attendant to transfer calls to a user. (Source: Google Workspace)
Step 6: In the Add a prompt for the n key, enter a message to create a voice command. For example, “Press one for sales.”
Step 7: Click the down arrow next to Select an action to choose what happens after the key message plays.
Step 8: Next, customize your business hours. On the left, Click Edit Business Hours. You can specify handling rules for holiday closures and after-hours.
Step 9: After configuring your auto-attendant, give it a try by clicking Preview on the bottom right, then select Call.
Step 10: Click the Publish button to complete the setup.
Creating ring groups
Google Voice lets you create ring groups or a shared mainline phone number where team members can answer calls from a single Google Voice number. An incoming call will ring all members of the ring group until someone picks up. Or, you could ring members sequentially in random order. Note that members added to a group must have a number assigned or a Voice license.
Step 2: At the top, click Create.
Step 3: Create a display name for your ring group and add a description (optional).
Step 4: In the Find users field, add the names of your ring group members. You can enter up to 25 members.
Step 5: Click Continue.
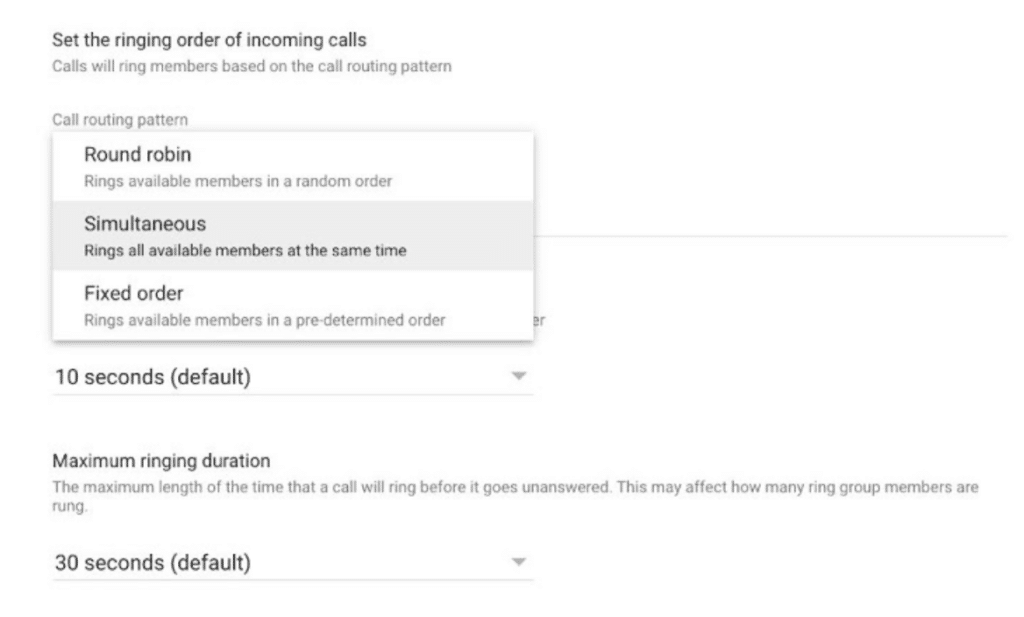
Google Voice offers three types of ring group orders. (Source: Google Voice)
Step 6: You will be led to another window to configure call handling. Here, you can set the ring order, attempt duration, and maximum ring duration. You can also tweak the ordering of how all ring group members will be called.
Step 7: Under Unanswered calls, choose what happens when a call isn’t answered after 30 seconds.
Step 8: Click Create Ring Group.
Step 9: The next window will ask you to assign numbers to your ring group. While this is optional, note that this serves as your business’ customer-facing number.
Step 10: Select Finish.
Viewing usage reports
Google Workspace administrators can access the audit and investigation page to monitor user activities in Google Voice. For example, you can view the details of calls and texts, including the cost, duration, and exact call times.
Step 2: Select Add a filter, then pick an attribute.
Step 3: From the pop-up window, choose an operator and a value, then click Apply.
Step 4: You can add several filters for your search. When done, click Search.Here are the available attributes for filtering Voice log event data:
- Call destination
- Call source
- Cost
- Date
- Duration
- Voicemail recipient
- Phone number
- Service name
- Email address
- New address
Best practices for using Google Voice
While Google Voice is incredibly easy to implement and use, there are a few strategies you can try to optimize Google Voice as a business phone system. Check out some of the best practices below:
- Create a detailed name for your auto-attendant: Be specific when creating a name and description for your auto-attendant. It will help you find a specific auto-attendant if you need to make changes later.
- Assign a Google Voice license to your team: Before using Google Voice for business, be sure to assign licenses to every team member.
- Use a country code: When calling abroad, enter the country code before the phone number. For example, for the United Kingdom, enter +44, followed by the phone number.
- Add a service address: Make sure to add a service address when assigned a Google Voice number. Remember, you can’t make calls without a service address.
- Use your carrier minutes: If your internet connection is unstable, Google Voice lets you use the minutes from your phone plan.
- Pin the Google Voice tab in your browser: If you’re using Google Voice on your desktop, pin voice.google.com in your Chrome browser to continue receiving calls even when working on other tabs.
- Link phone numbers: You can link up to six phone numbers to forward calls to if you don’t want to answer using Google Voice.
- Use custom call forwarding: Custom call forwarding lets you route calls from an individual or group of contacts to a specific phone number.
- Use Google Contacts: Manage your contact list at contacts.google.com. Make sure to update your rules for the new number if you change another user’s phone number.
Frequently asked questions (FAQs)
A Google Voice number works as a virtual phone number for calls, texts, and voicemails. You can also use it as a forwarding number if you want to direct incoming calls to another device.
Google Voice is free for anyone with an active Google account. Businesses with a Google Workspace subscription can purchase the Google Voice business add-on, which costs between $10 and $30 per user.
Yes, linking a phone number is optional once your Google Voice account is set up. However, incoming calls can only be answered through the Google Voice app.
Bottom Line
Using Google Voice for business is easy if you have a Google account and a US-based phone number. It is a great business phone solution for solopreneurs and small business owners with basic communication needs. It integrates seamlessly with Google Workspace apps and comes with a free phone number, a user-friendly interface, and a host of calling features.